CastPolish Update: Light/Dark Mode, Transcribe-Only, and Speaker Diarization Setup
Update for pyannote v4.x: A third model license is now required. Visit huggingface.co/pyannote/speaker-diarization-community-1 while logged in to HuggingFace and click Agree and access repository, in addition to the two models listed in Step 3 below.
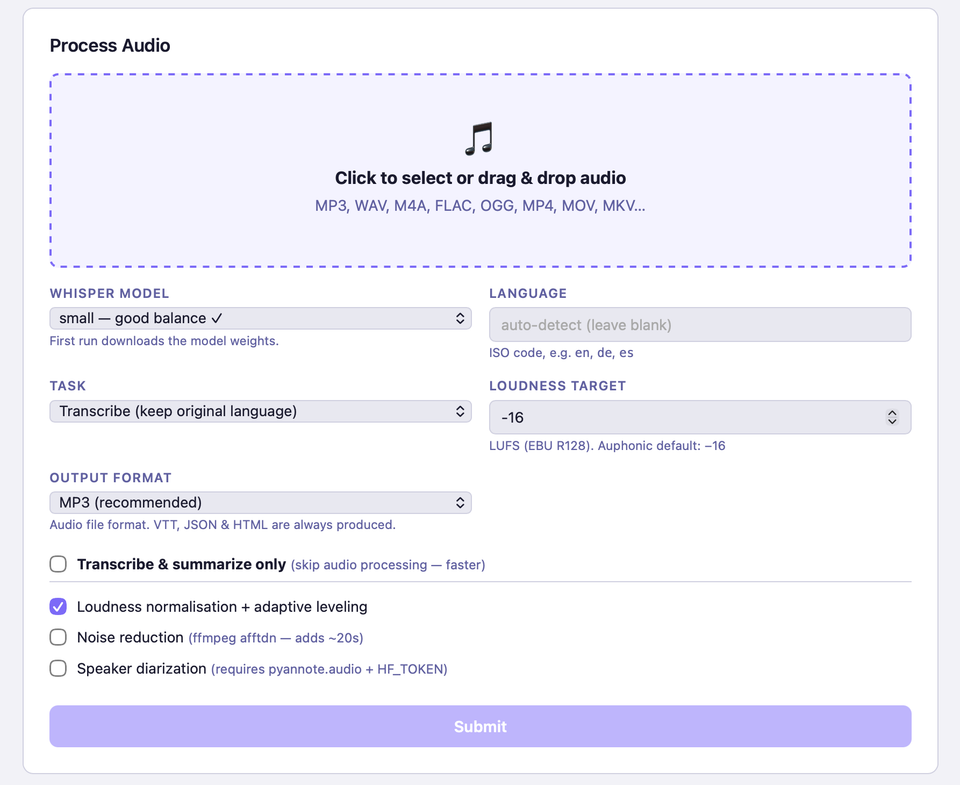
CastPolish has two new features: a light/dark mode that follows your Mac appearance, and a Transcribe & Summarize Only option that skips audio processing when you do not need it. This post covers both updates, then walks through the full setup for speaker diarization.
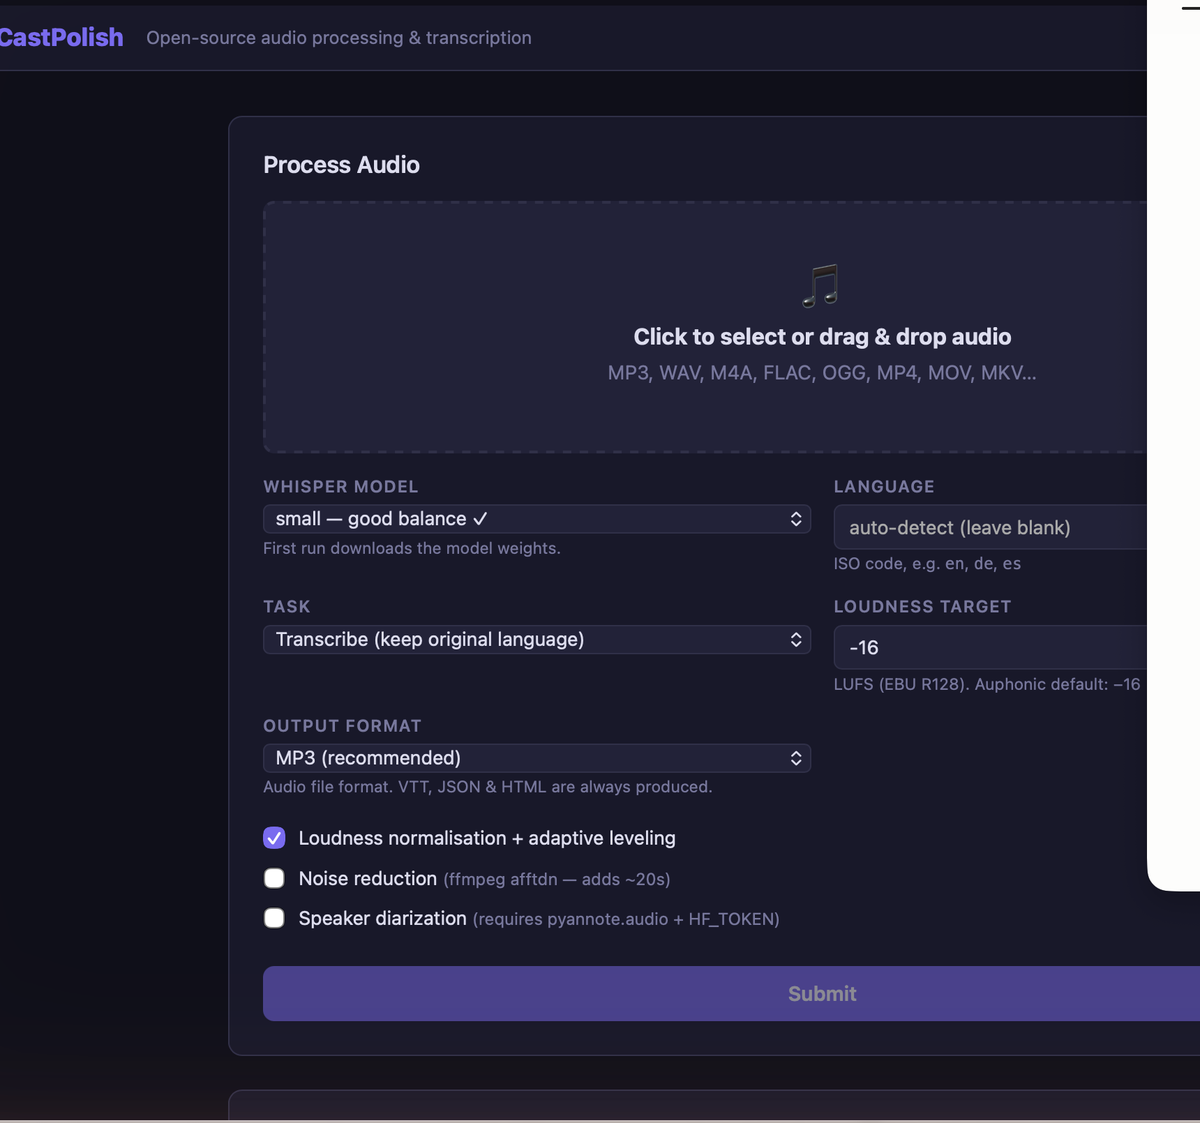
Light and Dark Mode
CastPolish now follows your macOS system appearance automatically. Dark Mac = dark app. Light Mac = light app. You can also override it at any time with the moon/sun toggle button in the top-right corner of the nav bar. Your preference is saved and remembered across sessions.
Transcribe and Summarize Only
A new checkbox sits at the top of the options panel: Transcribe & summarize only (skip audio processing - faster). When checked, CastPolish skips the entire audio pipeline - no loudness normalization, no compression, no noise reduction - and goes straight to transcription and AI shownotes.
This is useful when:
- You have already processed the audio and only need a transcript
- You are in a hurry and just need the shownotes and summary quickly
- You want to transcribe a recording exactly as-is without level changes
- You are testing a long file and do not want to wait for the full pipeline
The original file is copied unchanged to your output folder. Whisper still receives a clean 16 kHz mono WAV internally, so transcription accuracy is unaffected.
Setting Up Speaker Diarization
Speaker diarization labels who is speaking at each point in the transcript - essential for interviews, panels, or any multi-voice recording. CastPolish uses pyannote.audio for this. Setup takes about five minutes and requires a free HuggingFace account.
Step 1 - Install pyannote.audio
Open Terminal and run:
pip install pyannote.audio torchThis is a large download (~2 GB including PyTorch). Wait for it to complete fully before continuing.
Step 2 - Create a HuggingFace Account
Go to huggingface.co/join and create a free account. Confirm your email before continuing.
Step 3 - Accept Both Model Licenses
pyannote.audio uses two models that each require you to accept a license. Both are required - diarization will fail with an access error if either is missing.
- Visit huggingface.co/pyannote/speaker-diarization-3.1 - log in, then click the Agree and access repository button.
- Visit huggingface.co/pyannote/segmentation-3.0 - log in and accept that license too.
The Agree button only appears when you are logged in. If you do not see it, make sure you are signed in to your HuggingFace account.
Step 4 - Generate an Access Token
Step 5 - Enter the Token in CastPolish
Open CastPolish at http://localhost:8765, scroll down to Settings, and paste your token into the HuggingFace Token field. Click Save Settings. The Speaker diarization checkbox in the Process Audio panel will now work.
Step 6 - Enable Diarization on a Job
Check the Speaker diarization box before submitting a file. The first time you run it, pyannote downloads the model weights (~300 MB) - this only happens once. After that, speaker labels such as SPEAKER_00 and SPEAKER_01 appear inline in your transcript.
How to Update the Mac App
To pick up the new features, rebuild the app from your source folder:
cd ~/Documents/castpolish && python3 create_macos_app.pyWhen it finishes, drag the new CastPolish.app to your Applications folder and replace the old one. Done.
Full source code and release history at github.com/abc3-Mac/castpolish.
GPU Acceleration
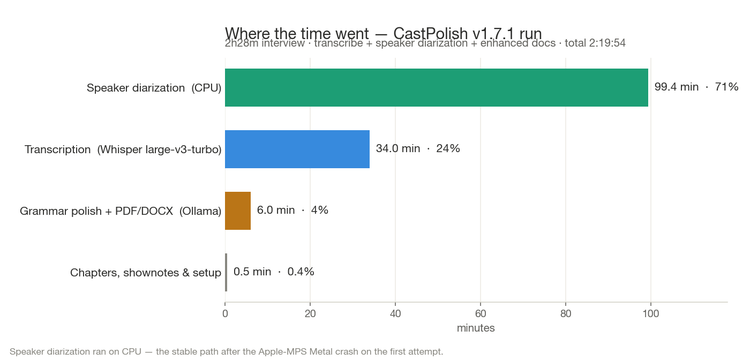
GPU acceleration: CastPolish automatically detects the best available hardware for diarization. On Apple Silicon Macs it uses Metal (MPS), on machines with an Nvidia GPU it uses CUDA, and on everything else it falls back to CPU. No configuration needed — it picks the fastest option automatically. On Apple Silicon, Metal-accelerated diarization is typically 3 to 5 times faster than CPU.

Comments ()